
전 회사에서 처음으로 K9S를 봤다. 쿠버네티스도 어려운데 k9s는 뭘까? 하는 마음이었다. 근데 그냥 단순하게 쿠버네티스를 CLI 환경에서 GUI로 모니터링/조작할 수 있는 도구였다. kubectl로 일일이 커맨드를 작성하는 게 아니라 UI로 쿠버네티스를 이용할 수 있는 것이다.
늘 도구나 언어 등을 공부할 때, 공식문서를 참고하는데 k9s는 이런 식으로 설명이 되어 있다.
K9s is a terminal based UI to interact with your Kubernetes clusters. The aim of this project is to make it easier to navigate, observe and manage your deployed applications in the wild. K9s continually watches Kubernetes for changes and offers subsequent commands to interact with your observed resources.
앞서 언급했던 것처럼, 터미널 기반의 UI로 쿠버네티스 클러스터와 상호작용할 수 있다. 참고로 k9s의 마스코트는 귀여운 강아지다.
설치 방법은 상당히 간단하다.
설치
바이너리
https://github.com/derailed/k9s/releases
맥
# Via Homebrew
brew install derailed/k9s/k9s

# Via MacPort
sudo port install k9s
리눅스
# Via LinuxBrew
brew install derailed/k9s/k9s

# Via PacMan
pacman -S k9s
윈도우
# Via scoop
scoop install k9s

# Via chocolatey
choco install k9s
이렇게 설치를 완료했으면 버전을 확인하여 설치가 제대로 됐는지 확인한다. 메타데이터도 대략 확인할 수 있다.
k9s version
k9s info
실행
k9s로 바로 실행할 수 있으며, 실행하기 전에 어떻게 UI를 구성할 것인지도 옵션으로 넣을 수 있다.
# Run K9s in a given namespace.
k9s -n mycoolns
# Run K9s and launch in pod view via the pod command.
k9s -c pod
# Start K9s in a non default KubeConfig context
k9s --context coolCtx
# Start K9s in readonly mode - with all modification commands disabled
k9s --readonly
1. 네임스페이스 지정
k9s -n 네임스페이스
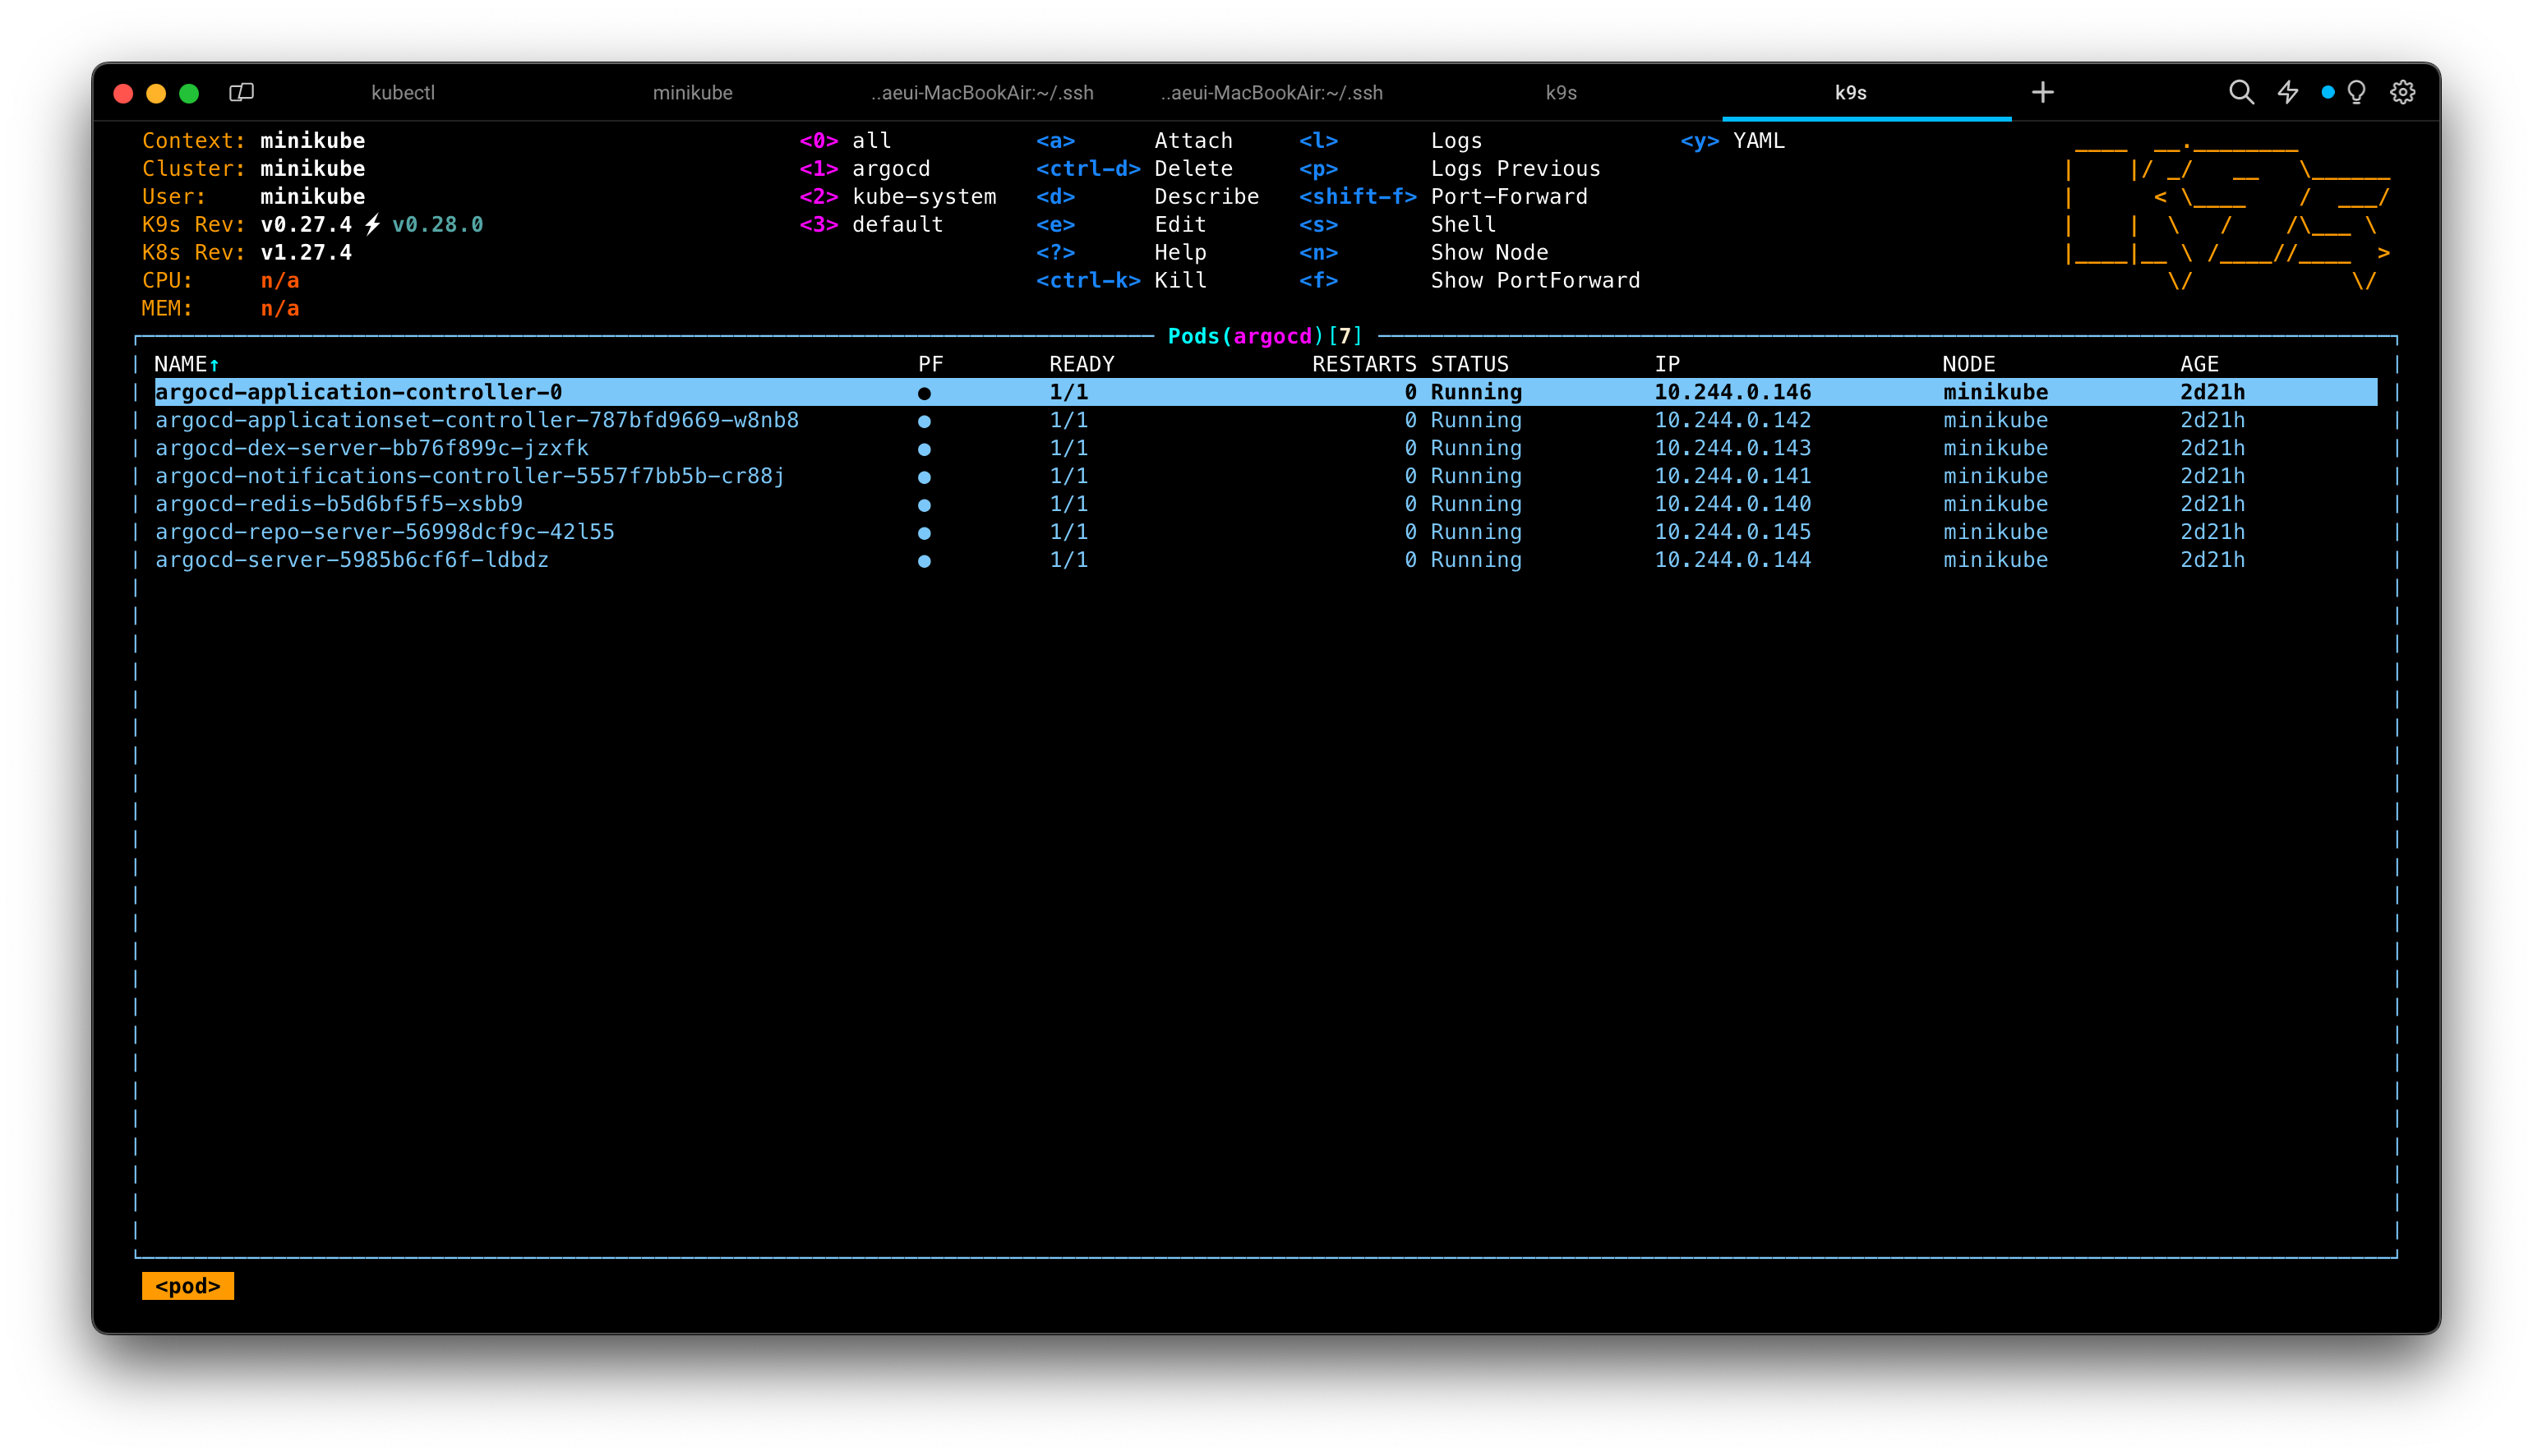
argocd 네임스페이스를 지정했을 때, 아래처럼 해당 네임스페이스에서의 오브젝트들을 볼 수 있다. 물론, 다른 네임스페이스도 키 바인딩으로 접근할 수 있다.
2. 커맨드 지정
k9s -c 커맨드
원하는 커맨드를 넣어서 시작할 수도 있다. 예를 들어, pod를 커맨드로 넣으면 pod를 모니터링하고, service를 커맨드로 넣으면 service를 모니터링한다.
k9s -c pod
k9s -c service
3. Context 지정
k9s --context 컨텍스트
쿠버네티스도 context를 생성하거나 사용할 수 있다. 기본적으로 current context를 가져온다. 나는 minikube를 사용하고 있으므로 아래와 같이 컨텍스트를 기본적으로 사용한다.
k9s --context minikube
왼쪽 위에 Context와 Cluster가 있는데, 만약 현재 존재하지 않는 context를 넣으면 아래처럼 n/a로 기재되고 전체 Context를 보여준다.

4. 읽기 전용 모드
k9s --readonly
수정이 발생해서는 안되는 상황에서는 읽기 전용 모드를 사용할 수 있다.


아예 수정할 수 있는 커맨드가 사라진다. 키 바인딩도 사용할 수 없다.
키 바인딩
단축키들은 아래와 같다.
| Action | Command | Comment |
| Show active keyboard mnemonics and help | ? | |
| Show all available aliases and resources on the cluster | ctrl-a or :alias | |
| To bail out of K9s | :q, ctrl-c | |
| View a Kubernetes resource using singular/plural or short-name | :po⏎ | accepts singular, plural, short-name or alias ie pod or pods |
| View a Kubernetes resource in a given namespace | :alias namespace⏎ | |
| Filter out a resource view given a filter | /filter⏎ | Regex2 supported ie fred|blee to filter resources named fred or blee |
| Inverse regex filer | /! filter⏎ | Keep everything that doesn’t match. Not implemented for logs. |
| Filter resource view by labels | /-l label-selector⏎ | |
| Fuzzy find a resource given a filter | /-f filter⏎ | |
| Bails out of view/command/filter mode | <esc> | |
| Key mapping to describe, view, edit, view logs,… | d,v, e, l,… | |
| To view and switch to another Kubernetes context | :ctx⏎ | |
| To view and switch to another Kubernetes context | :ctx context-name⏎ | |
| To view and switch to another Kubernetes namespace | :ns⏎ | |
| To view all saved resources | :screendump or sd⏎ | |
| To delete a resource (TAB and ENTER to confirm) | ctrl-d | |
| To kill a resource (no confirmation dialog!) | ctrl-k | |
| Toggle Wide Columns | ctrl-w | Equivalent to kubectl ... -o wide |
| Toggle Error State | ctrl-z | View resources in error condition |
| Launch pulses view | :pulses or pu⏎ | |
| Launch XRay view | :xray RESOURCE [NAMESPACE]⏎ | RESOURCE can be one of po, svc, dp, rs, sts, ds, NAMESPACE is optional |
| Launch Popeye view | :popeye or pop⏎ | See https://popeyecli.io |
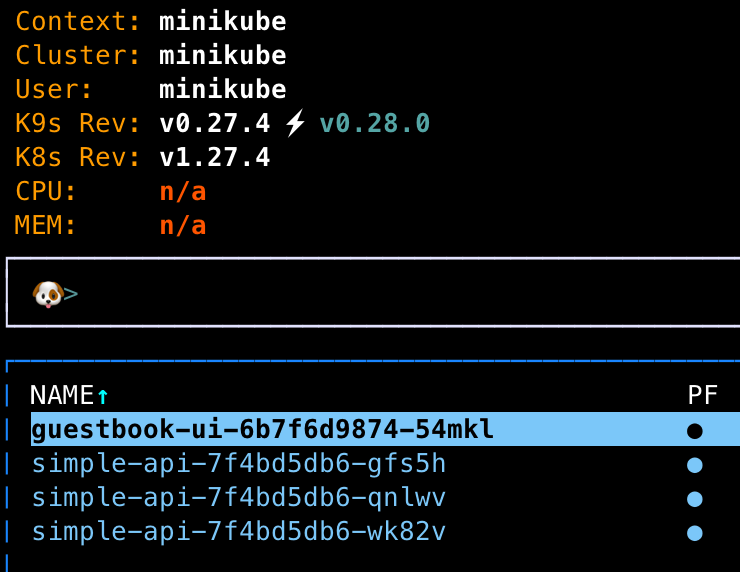
콜론을 누르면 아래와 같이 🐶 강아지가 나오는데 여기에 원하는 커맨드를 입력하면 된다.
슬래시를 누르면 🐩 푸들이 나온다. 제작자가 강아지를 좋아하나보다

자주 쓰일만 하거나 도움될 만한 커맨드라고 생각한 것들은 다음과 같다.
- ?: k9s 터미널에서 바로 ?를 입력하면 컴팩트하게 쓸 수 있는 단축키를 선별해서 보여준다.
- ctrl + a, :alias : 컨트롤키와 a를 같이 누르거나, k9s 터미널에서 바로 :alias를 입력하면 모든 별칭을 보여준다.
- :pod namespace : 해당 네임스페이스에 있는 파드를 보여준다. 물론 pod 대신 원하는 오브젝트 별칭을 넣으면 된다.
- /filter : 현재 오브젝트에서 입력한 필터링 항목으로 필터링한다. 예를 들어서 현재 pod를 모니터링하고 있다면, 정규표현식을 통해 입력된 필터 항목으로 pod를 걸러낸다.

- /-l label-selector : 레이블 선택자를 통해 원하는 오브젝트를 찾을 수 있다. 예를 들어서 simple-api라는 디플로이먼트의 레이블에 app: simple-api 라는 레이블이 존재한다면, 아래와 같이 찾을 수 있다.

- esc : 뒤로가기
- ctrl + w : kubectl get 의 -o wide 옵션과 같다. 레이블도 볼 수 있어 좋다.
- s : 컨테이너 셸로 접속한다.
- y: 오브젝트의 yaml 파일을 확인할 수 있다. kubeclt get -o yaml 과 같다.
- d: describe와 같다.
기타 기능
생각보다 더 다양한 기능을 제공하며, 꽤 유용하다.
1. pulse
:pulse
클러스터의 상태를 한 눈에 볼 수 있다. 이 기능을 사용하려면 metrics-server가 있어야 한다. 그렇지 않으면 최하단 메시지처럼 클러스터에서 metrics-server를 찾지 못했다고 경고문이 나온다.

만약 minikube를 사용중이라면 addon을 enable로 설정하면 쉽게 실행시킬 수 있다.
minikube addons enable metrics-server
pod와 service의 오브젝트 스펙을 보면 metrics-server로 지정되어 있다.
$ kubectl get svc metrics-server -n kube-system -o yaml
apiVersion: v1
kind: Service
metadata:
  annotations:
    kubectl.kubernetes.io/last-applied-configuration: |
      {"apiVersion":"v1","kind":"Service","metadata":{"annotations":{},"labels":{"addonmanager.kubernetes.io/mode":"Reconcile","k8s-app":"metrics-server","kubernetes.io/minikube-addons":"metrics-server","kubernetes.io/minikube-addons-endpoint":"metrics-server","kubernetes.io/name":"Metrics-server"},"name":"metrics-server","namespace":"kube-system"},"spec":{"ports":[{"name":"https","port":443,"protocol":"TCP","targetPort":"https"}],"selector":{"k8s-app":"metrics-server"}}}
  creationTimestamp: "2023-11-07T11:43:42Z"
  labels:
    addonmanager.kubernetes.io/mode: Reconcile
    k8s-app: metrics-server
    kubernetes.io/minikube-addons: metrics-server
    kubernetes.io/minikube-addons-endpoint: metrics-server
    kubernetes.io/name: Metrics-server
  name: metrics-server
  namespace: kube-system
  resourceVersion: "168013"
  uid: f47585e2-6698-4343-9619-9ebe0035ca9b
spec:
  clusterIP: 10.102.99.228
  clusterIPs:
  - 10.102.99.228
  internalTrafficPolicy: Cluster
  ipFamilies:
  - IPv4
  ipFamilyPolicy: SingleStack
  ports:
  - name: https
    port: 443
    protocol: TCP
    targetPort: https
  selector:
    k8s-app: metrics-server
...$ kubectl get deployment metrics-server -n kube-system -o yaml
apiVersion: apps/v1
kind: Deployment
metadata:
annotations:
deployment.kubernetes.io/revision: "1"
kubectl.kubernetes.io/last-applied-configuration: |
{"apiVersion":"apps/v1","kind":"Deployment","metadata":{"annotations":{},"labels":{"addonmanager.kubernetes.io/mode":"Reconcile","k8s-app":"metrics-server","kubernetes.io/minikube-addons":"metrics-server"},"name":"metrics-server","namespace":"kube-system"},"spec":{"selector":{"matchLabels":{"k8s-app":"metrics-server"}},"strategy":{"rollingUpdate":{"maxUnavailable":0}},"template":{"metadata":{"labels":{"k8s-app":"metrics-server"},"name":"metrics-server"},"spec":{"containers":[{"args":["--cert-dir=/tmp","--secure-port=4443","--kubelet-preferred-address-types=InternalIP,ExternalIP,Hostname","--kubelet-use-node-status-port","--metric-resolution=60s","--kubelet-insecure-tls"],"image":"registry.k8s.io/metrics-server/metrics-server:v0.6.4@sha256:ee4304963fb035239bb5c5e8c10f2f38ee80efc16ecbdb9feb7213c17ae2e86e","imagePullPolicy":"IfNotPresent","livenessProbe":{"failureThreshold":3,"httpGet":{"path":"/livez","port":"https","scheme":"HTTPS"},"periodSeconds":10},"name":"metrics-server","ports":[{"containerPort":4443,"name":"https","protocol":"TCP"}],"readinessProbe":{"failureThreshold":3,"httpGet":{"path":"/readyz","port":"https","scheme":"HTTPS"},"periodSeconds":10},"resources":{"requests":{"cpu":"100m","memory":"200Mi"}},"securityContext":{"readOnlyRootFilesystem":true,"runAsNonRoot":true,"runAsUser":1000},"volumeMounts":[{"mountPath":"/tmp","name":"tmp-dir"}]}],"priorityClassName":"system-cluster-critical","serviceAccountName":"metrics-server","volumes":[{"emptyDir":{},"name":"tmp-dir"}]}}}}
creationTimestamp: "2023-11-07T11:43:42Z"
generation: 1
labels:
addonmanager.kubernetes.io/mode: Reconcile
k8s-app: metrics-server
kubernetes.io/minikube-addons: metrics-server
name: metrics-server
namespace: kube-system
resourceVersion: "168102"
uid: d507a9fd-78b0-4808-b529-a972fef137e1
spec:
progressDeadlineSeconds: 600
replicas: 1
revisionHistoryLimit: 10
selector:
matchLabels:
k8s-app: metrics-server
...
다시 k9s 대시보드를 통해 pulse를 확인할 수 있다. 또한, 좌상단에서 찾지 못한 cpu와 memory의 사용량도 이제 볼 수 있다.

2. Xray
:xray 리소스
클러스터 리소스를 탐색하고 의존성을 확인할 수 있다.
예를 들어, deployment 리소스를 확인하면 다음과 같다.

3. popeye
:popeye
뽀빠이다. 이스터에그인줄 알았는데 뽀빠이라는 도구다. 쿠버네티스 클러스터를 분석하여 잠재적으로 가지고 있는 문제들을 발견해낸다. 현재로는 노드, 파드, 네임스페이스 및 서비스들을 검사한다고 한다.

정리하며
https://github.com/kubernetes/dashboard 이미 쿠버네티스에서는 dashboard를 제공한다. 그리고 설치 방법도 helm이랑 manifest를 제공하므로 설치 방법도 어렵다거나 하진 않아 보인다. 그래도 설정이 필요하고 쿠버네티스 내부에 설치하여 브라우저로 확인한다는 점 때문에, 이런 점들이 디메리트로 작용한다면 k9s가 좋은 선택이 될 것 같다.
공부하면서 정리했을 때는 대략 이런 장단점이 있었다.
| 공통점 | 장점 | 단점 | |
| dashboard | - 파드 접속, 리소스 편집 등이 가능하다. - 메트릭을 확인할 수 있다. - 커스터마이징이 가능하다. - readonly 권한을 부여할 수 있다. |
- 브라우저로 간단하게 접속할 수 있다. - 리소스를 생성할 수 있다. - 알림을 받을 수 있다. - 토큰을 통해 권한을 달리 사용할 수 있다. |
- 쿠버네티스의 리소스를 계속 사용한다. |
| k9s | - 필요할 때만 터미널로 클러스터를 확인할 수 있다. - 클러스터의 잠재적 문제점을 확인할 수 있다(popeye , 물론 클러스터에 직접 설치해서 사용해도 된다). - 커스터마이징이 상대적으로 더 자유롭다. |
- 약간의 커맨드를 알고 있어야 한다. - 터미널이기 때문에 대시보드에 비해서는 조작이 상대적으로 덜 편리하다. |
특히 대시보드의 접근 제어가 눈에 들어왔다. Bearer token을 사용하여 로그인을 할 수 있는데, 이를 위해서는 유저를 생성해야 한다. 아래 두 문서가 잘 정리되어 있는 것 같아서 나중에 따라서 생성해보면 좋을 것 같다.
https://github.com/kubernetes/dashboard/blob/master/docs/user/access-control/creating-sample-user.md
https://platform9.com/kb/kubernetes/how-to-grant-read-only-access-to-the-kubernetes-dashboard
How-to Grant Read-Only Access to the Kubernetes Dashboard - Platform9 Knowledge Base
Problem. A read-only access role needs to be created for access to the Kubernetes Web UI (Dashboard). Environment. Platform9 Managed Kubernetes - All Versions. Kubernetes Web UI (Dashboard).
platform9.com
참고
K9s - Manage Your Kubernetes Clusters In Style
Who Let The Pods Out? K9s is a terminal based UI to interact with your Kubernetes clusters. The aim of this project is to make it easier to navigate, observe and manage your deployed applications in the wild. K9s continually watches Kubernetes for changes
k9scli.io
popeye
👀 A Kubernetes cluster resource sanitizer
popeyecli.io
https://github.com/kubernetes/dashboard
GitHub - kubernetes/dashboard: General-purpose web UI for Kubernetes clusters
General-purpose web UI for Kubernetes clusters. Contribute to kubernetes/dashboard development by creating an account on GitHub.
github.com
https://artifacthub.io/packages/helm/k8s-dashboard/kubernetes-dashboard
kubernetes-dashboard 7.0.0-alpha1 · helm/k8s-dashboard
General-purpose web UI for Kubernetes clusters
artifacthub.io
https://github.com/kubernetes/dashboard/blob/master/docs/user/access-control/creating-sample-user.md
https://platform9.com/kb/kubernetes/how-to-grant-read-only-access-to-the-kubernetes-dashboard
How-to Grant Read-Only Access to the Kubernetes Dashboard - Platform9 Knowledge Base
Problem. A read-only access role needs to be created for access to the Kubernetes Web UI (Dashboard). Environment. Platform9 Managed Kubernetes - All Versions. Kubernetes Web UI (Dashboard).
platform9.com
'데브옵스 & 인프라 > Kubernetes' 카테고리의 다른 글
| [Kubernets] Pod 디버깅 - 오류 정보 확인하고 해결하기 (1) | 2023.11.09 |
|---|---|
| [Kubernetes/helm] 쿠버네티스의 패키지 관리자 Helm 알아보기 (5) | 2023.11.09 |
| [ArgoCD] private repository 애플리케이션 생성하기 (0) | 2023.11.06 |
| [K8S/ArgoCD] ArgoCD로 애플리케이션 배포 (2) | 2023.11.06 |
| minikube에서 파드로 서버 띄우고, 컨테이너 접근하기(MacOS docker driver 이슈) (1) | 2023.11.01 |